

Your garage door is an essential part of your daily routine, providing secure access to your home and safeguarding your vehicles and belongings. However, when those crucial garage door springs break, it can leave you feeling trapped and frustrated. That’s where this emergency guide comes in to save the day.
In this comprehensive article, we will walk you through the steps to take when faced with a garage door spring emergency. From identifying the signs of a broken spring to providing you with a step-by-step guide on how to safely deal with the situation, we’ve got you covered. We’ll also discuss the importance of regular garage door maintenance to prevent such emergencies in the first place and shed light on the different types of garage door springs, helping you understand what you’re dealing with.
The Dreaded ‘Snap’: Recognizing the Signs of a Failing Garage Door Spring
Your garage door springs are the unsung heroes of your daily routine, quietly lifting and lowering the heavy door countless times without much notice. However, when one of these springs reaches the end of its lifespan, it can lead to a sudden and potentially dangerous situation, often accompanied by a dreaded ‘snap’ or ‘bang.’
Understanding the signs of a failing garage door spring is crucial to preventing accidents and addressing issues promptly. Here are the key indicators to watch for:
1. Unusual Sounds: One of the earliest signs of a failing spring is unusual noises during operation. If you hear creaking, grinding, or a loud bang when opening or closing your garage door, it’s a clear signal that something may be wrong with the springs.
2. Imbalance: A properly functioning garage door should open and close smoothly. If you notice that one side of the door appears lower than the other or if it seems to be sagging, this could indicate a spring problem.
3. Slow Operation: As springs weaken, they may struggle to support the weight of the door. This can result in slower opening and closing times. If your garage door starts moving at a noticeably reduced speed, it’s time for a residential garage door spring replacement.
4. Gaps or Gaps in the Spring: Examine the springs visually. If you notice any gaps, spaces, or visible damage in the spring coils, this is a clear sign of wear and potential failure.
5. Door Doesn’t Stay Open: Garage doors should remain in the open position when lifted. If your door starts to fall or feels unusually heavy when lifted manually, it’s a strong indication of spring trouble.
Recognizing these signs early can help you take preventive measures and avoid the inconvenience and danger of a broken garage door spring. In the next section, we will delve into the steps you should take before contacting an emergency garage door repair service near you.

Quick Fixes vs. Professional Help: When to DIY and When to Dial a Tech
When confronted with a failing garage door spring, the next critical decision you’ll face is whether to attempt a DIY fix or seek the expertise of a professional technician, like those at CT Garage Doors. Making the right choice can save you time, and money, and potentially prevent accidents.
DIY Fixes:
1. Safety First: Before attempting any DIY repairs, prioritize safety. Disconnect the garage door opener and ensure the door is fully closed to prevent it from accidentally falling.
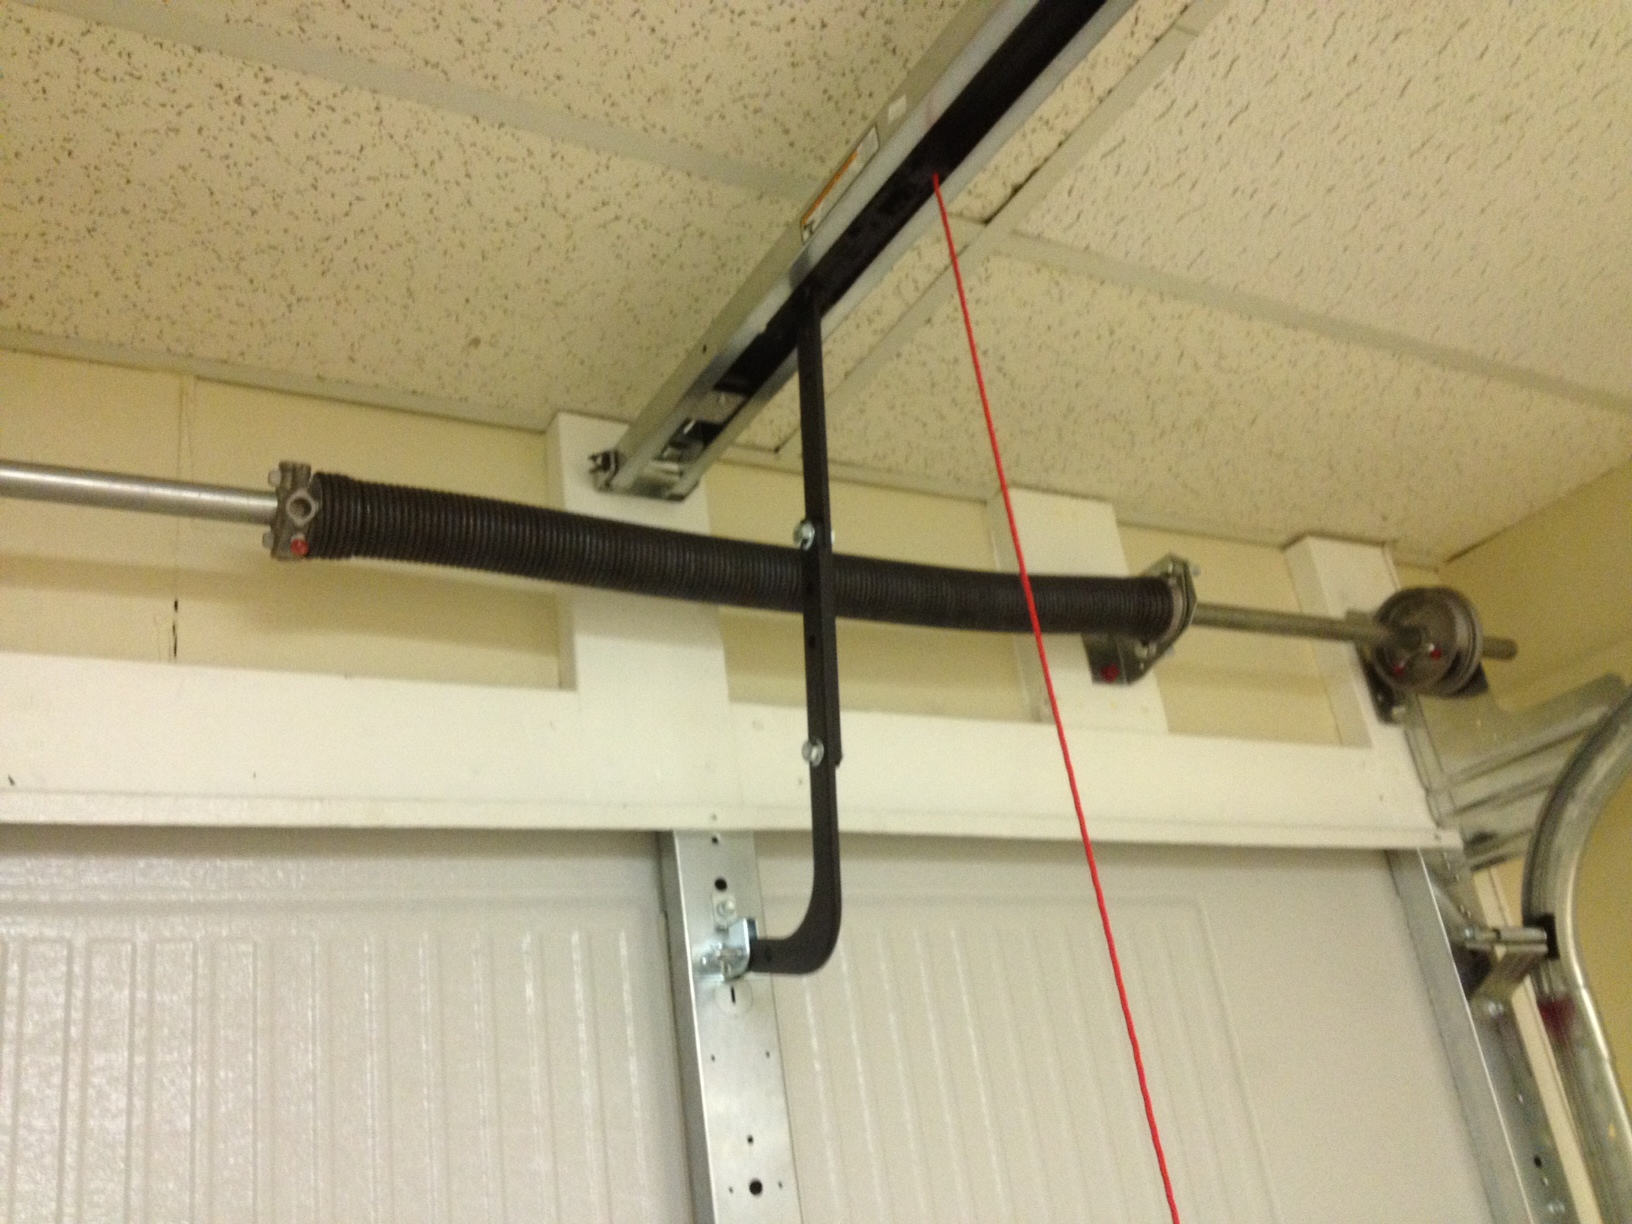
2. Torsion Springs vs. Extension Springs: Identify the type of springs you have. Torsion springs, typically mounted above the door, can be extremely dangerous to work on and are best left to professionals. Extension springs, found on both sides of the door, are usually safer for DIY repairs.
3. Replace Both Springs: If one spring has broken, it’s often recommended to replace both springs, even if the other seems fine. This ensures a balanced operation and reduces the risk of another spring failing shortly after the repair.
4. Follow Guidelines: If you decide to tackle the repair yourself, follow the step-by-step instructions carefully. There are many online resources and videos that can guide you through the process. However, be prepared for a physically demanding task, and use the right tools and safety equipment.
Professional Help:
1. Safety Concerns: If you have any doubts about your ability to safely repair the springs or if you’re dealing with torsion springs, it’s best to call a professional technician. Mishandling a garage door spring repair can lead to serious injuries.
2. Warranty and Expertise: Professional technicians have the experience and expertise to diagnose issues accurately and provide long-lasting solutions. Hiring a pro also ensures that you won’t void any existing warranties on your garage door system.
3. Efficiency: Professionals can often complete the repair more quickly and efficiently, minimizing the downtime of your garage door.
In summary, while DIY repairs may be suitable for some garage door spring issues, safety should always be your top priority. When in doubt, or when dealing with complex torsion springs, it’s wise to dial a technician to ensure a safe and effective repair. In the next section, we will discuss the steps to take if you decide to proceed with a DIY repair.
Getting Back on Track: Your Roadmap to a Fully Functional Garage Door
So, you’ve decided to take matters into your own hands and repair your garage door springs yourself. While this can be a cost-effective option, it’s essential to approach the task with caution and a well-structured plan. Here’s your roadmap to successfully restoring your garage door to full functionality:
1. Gather the Necessary Tools: Before you begin, make sure you have all the required tools and safety equipment. This typically includes winding bars, vice grips, pliers, safety glasses, and a socket wrench.
2. Disconnect the power and Secure the Door: To ensure your safety, disconnect the power to the garage door opener and secure the door in a fully closed position. This prevents any accidental movement while you work on the springs.
3. Identify the Springs: Confirm the type of springs you have (torsion or extension). Refer to your garage door’s manual or consult online resources if you’re unsure.
4. Replace Both Springs (If Applicable): If one spring has broken, it’s advisable to replace both springs to maintain balance. Release the tension from the old springs following safe procedures, and then remove and replace them with new ones.
5. Wind Torsion Springs (If Applicable): If you have torsion springs, winding them requires precision. Use winding bars to turn the springs slowly, following the manufacturer’s guidelines for the correct number of turns.
6. Test the Door: After the springs are in place and properly tensioned, carefully test the garage door by opening and closing it manually. Ensure it moves smoothly without any jerking or imbalance.
7. Reconnect Power and Test with an Opener: Once you’re satisfied with the manual operation, reconnect the power to your garage door opener and test it using the remote control. Ensure that the opener functions correctly and that the door operates smoothly.
8. Regular Maintenance: To extend the life of your new springs and prevent future issues, implement a regular maintenance schedule. Lubricate the springs and all moving parts periodically and inspect for signs of wear or damage.
Remember that safety should always be your top priority. If at any point you feel uncomfortable or unsure during the DIY repair process, it’s wise to stop and consult our professional technician for affordable garage door repairs. Garage door springs can be under significant tension and pose a risk if mishandled. Following this roadmap with care and attention to detail can help you restore your garage door’s functionality safely and effectively.
Conclusion
In summary, understanding the signs of failing garage door springs and making informed decisions regarding repairs is vital for the safety and functionality of your garage door. Whether you choose to tackle the repair yourself or enlist the help of a professional, always prioritize safety, and don’t hesitate to ask questions or seek expert guidance when needed. With the right knowledge and approach, you can keep your garage door running smoothly and securely for years to come.
Frequently Asked Questions
Question: Can I replace just one spring if it breaks, or should I replace both?
Answer: It’s generally recommended to replace both springs if one breaks, even if the other seems fine. This helps maintain balance and reduces the risk of the remaining spring failing
soon after.
Question: How can I extend the lifespan of my garage door springs?
Answer: Regular maintenance is key. Lubricate the springs and all moving parts every few months, visually inspect for wear, and ensure your garage door is properly balanced.
Question: When should I call a professional technician for help?
Answer: If you’re unsure about your ability to safely repair the springs or if you have torsion springs, it’s best to consult a professional. Additionally, if the door becomes unstable, jerky, or exhibits any unusual behavior, seek expert assistance immediately.